Precision Planning: How to Measure and Map Your Backyard for the Perfect Backyard Furniture Layout

backyard furniture

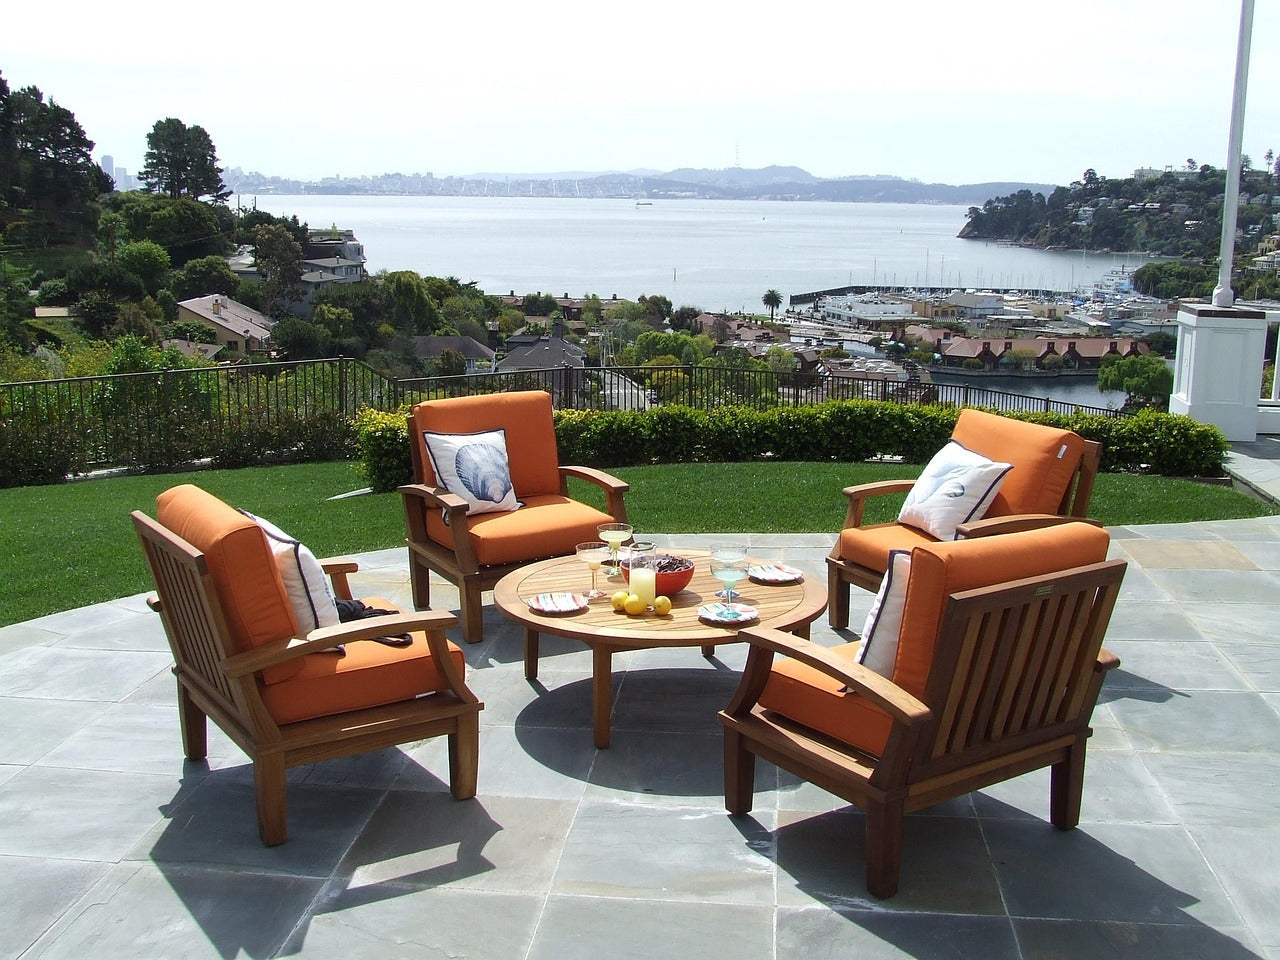
Your backyard is a blank canvas for outdoor living, and with the proper guidance, realizing its potential is entirely feasible. It requires more than just picking attractive backyard furniture. The common pitfall is purchasing pieces based solely on aesthetics, only to find they crowd the space, obstruct pathways, or feel "off." The key to creating an outdoor oasis that is both beautiful and highly functional lies in meticulous measurement and accurate mapping —a task you can confidently undertake.


A recent survey of2,000 U.S. adults with backyards found that 81% are eager to host parties outdoors, but 14% need time to prepare their spaces. Notably, 34% plan to make improvements, investing an average of 7 hours per week and up to $1,400 to get their yards ready for guests. It underscores the effort and expense many consider essential for an inviting outdoor setting.


This comprehensive 1500-word guide will walk you through the essential steps, tools, and techniques needed to transform your outdoor area into a scaled, workable blueprint. By learning to map your backyard precisely, you eliminate guesswork and ensure that every piece of backyard furniture you select integrates perfectly, respecting traffic flow and maximizing comfort. As you cover everything from basic perimeter measurements to advanced functional zoning and template testing, you'll feel a sense of accomplishment, setting the stage for a truly customized outdoor experience.


backyard furniture


Phase 1: Preparation – Essential Tools and Preliminary Assessment


Before any measuring begins, proper preparation ensures efficiency and accuracy. This groundwork is vital for establishing the scope of your project.


1. Gathering Your Measurement Toolkit


Accuracy starts with the right equipment. Invest in quality tools, as small measurement errors compound into significant layout problems.

  • Long Tape Measure: Essential for spanning large distances. A 50-foot or 100-foot fiberglass tape is recommended for outdoor use, as it resists kinks and moisture.
  • Graph Paper: The foundation of your scaled map. Select a standard grid size (e.g., 1/4-inch squares).
  • Pencil, Eraser, and Clipboard: For sketching and corrections in the field.
  • Straightedge or Ruler: Necessary for drawing clean, straight lines when transferring measurements to the map.
  • Level or Plumb Bob (Optional): Useful for ensuring vertical features (like walls or posts) are measured accurately.
  • Measuring Wheel (Optional): Handy for quickly measuring long, unobstructed stretches of lawn or pavement.
  • Camera or Smartphone: To take reference photos that capture the context of your measurements (e.g., where a door swings, or the height of a sill).


SET-368 11-pc Toscana Dining Table Set - The Charming Bench Company / Backyard furniture


2. Defining the Usable Area and Fixed Elements


Identify and clearly mark the boundaries of the area where you intend to place your backyard furniture.

  • Hardscape Boundaries: This includes the edges of your deck, patio, or paved seating area, as well as any retaining walls that define the space's limits.
  • Fixed Obstacles: Note all permanent structures that will impact furniture placement:
    • Built-in grills, fire pits, or kitchens.
    • Large, immovable planters or garden beds.
    • Pool edges, hot tubs, or fountains.
    • Large trees or structural posts/columns.
    • Utility boxes, spigots, and electrical outlets.
  • Vertical Considerations: Measure the height of any overhead obstructions, such as pergolas, eaves, or large tree limbs. Also, measure the clearance beneath windows or the height of railings.


Phase 2: Taking Precise Dimensional Measurements


The goal is to capture the exact length, width, and location of every feature. This data will serve as the foundation for your scale drawing.


1. Measuring the Perimeter


Always start with the outer edges of the designated furniture area.

  • Rectangular or Square Spaces: Measure the length of all four sides. Crucially, measure the two diagonal distances (corner to opposite corner). If the diagonals are equal, your corners are square (90 degrees). If they are unequal, you have a parallelogram, and you'll need to use triangulation (see below) to ensure accuracy.
  • Irregular Shapes (L-Shapes, Curves): Break complex shapes down into a series of smaller, simple rectangles. For curved areas (like a curved walkway or patio edge), establish a long, straight "baseline" near the curve, then take perpendicular "offset" measurements from the baseline to the curve at regular intervals (e.g., every 2 feet).


2. Locating Fixed Elements with Triangulation


To accurately place permanent fixtures onto your map, you need to measure their distance from established boundaries. Triangulation is the most reliable method for irregular shapes.

  1. Select Two Known Points: Choose two corners or points on your established perimeter (e.g., Corner A and Corner B of the patio).
  2. Measure to the Feature: Measure the distance from Corner A to a specific point on the fixture (e.g., the closest edge of a built-in fire pit).
  3. Measure from the Second Point: Measure the distance from Corner B to the same point on the fixture.
  4. Footprint: Finally, measure the dimensions (length and width/diameter) of the fixture itself.

Using two intersecting measurements (A-to-Feature and B-to-Feature) pins down the precise location of the fixture on your map, regardless of the backyard's overall shape.


Crucial Tip: The Wall Baseline

When dealing with a space adjacent to the house, use the house wall as your primary baseline. Measure everything—the depth of the patio, the location of doors, and the position of all fixtures—out from this one straight line to maintain consistency and minimize errors.


Low Boy Fire Pit (30" & 36") - The Charming Bench Company


Phase 3: Creating the Scaled Blueprint


It is the process of translating your raw numbers into a visual, usable plan.


1. Selecting and Applying the Scale


The scale shows how you can represent actual distances on your paper.

  • Standard Scale: The most common and manageable scale for residential projects is1/4 inch equals 1 foot (1/4" = 1'). It means every quarter-inch square on your graph paper represents one square foot of your backyard.
    • Calculation Example: A patio 24 feet long will be drawn as a 6-inch line on your paper (24 feet X 0.25 inches/foot = 6 inches).


2. Drafting the Permanent Features


  1. Outline the Perimeter: Start with the baseline (usually the house wall) and accurately draw the outline of your usable area (deck, patio, etc.) onto the graph paper using your ruler and the chosen scale.
  2. Plot Fixed Elements: Using your triangulation and dimension data, accurately draw in all the permanent fixtures (grill, tree, pool, steps).
  3. Mark Doors and Traffic: Draw in all external doorways, noting the direction they swing. Lightly mark the essential traffic pathways (e.g., from the house to the gate or pool).
  4. Double-Check: Visually review your drawing against your photos and original measurements. The scaled plan is now your definitive backyard furniture layout map.


Phase 4: Functional Zoning and Traffic Flow


A successful layout considershow the space will be used, not justwhat will be placed in it.


1. Identify Activity Zones


Determine the primary activities you want to host and define separate zones for them.

  • Conversation/Lounge Zone: Sofas, chairs, coffee table—the comfortable area for socializing.
  • Dining Zone: Table and chairs for outdoor meals, often best placed near the house kitchen.
  • Cooking/Prep Zone: Around the grill, outdoor kitchen, or bar area.
  • Recreation/Relaxation Zone: Hammocks, fire pits, or sun lounges.


2. Planning for Movement (The 3-Foot Rule)


The most critical factor in successful backyard furniture layout is traffic flow. A crowded space feels chaotic, regardless of the furniture's quality.

  • Traffic Pathways: Ensure a minimum clear width of3 feet (36 inches) for all primary paths (e.g., from the back door to the dining table, or around the pool). Draw these mandatory pathways lightly on your map.
  • Seating Clearance: For conversation areas, allow at least30 inches between the seating edge and the nearest fixed obstacle (like a railing).
  • Dining Clearance: Ensure you have enough space for chairs to be pulled out comfortably—ideally3 feet (36 inches) behind the chair from the table edge to the nearest wall or obstruction.


Phase 5: Testing the Layout with Scaled Templates


This crucial step lets you audition different furniture pieces and arrangements without committing to anything.


1. Preparing Furniture Templates


You need paper cutouts representing the exact size of the backyard furniture you are considering.

  1. Gather Dimensions: Look up the precise length, width, and depth of the specific furniture model (e.g., sectional, round table, chaise lounge).
  2. Create Templates: On a separate sheet of paper or cardstock, draw these pieces to the exact scale you used for your map (e.g., 1/4" = 1').
    • Example: A sofa measuring96 inches (8 feet) long by40 inches (approximately 3.33 feet) deep would be drawn on the 1/4" = 1' scale map as2 inches (for the length) by approximately0.83 inches (for the depth).
  3. Cut and Label: Cut out the templates and label them clearly (e.g., "7-pc Sectional," "60-in Dining Table").


2. Experimenting on Your Blueprint


Place the furniture templates onto your scaled map within the functional zones you defined.

  • Test Configurations: Move the templates around, trying different alignments (facing a view, facing each other). It instantly reveals which pieces are too large or small for a specific zone.
  • Verify Clearances: Use your ruler to measure the template distances:
    • Conversation Spacing: Place the coffee table template14 to 18 inches away from the sofa template for comfortable reach.
    • Zone Integrity: Ensure furniture in one zone doesn't encroach on pathways or the functional space of an adjacent zone.
    • Door Swing: Make sure the backyard furniture does not block the full opening of any doors or gates.


Phase 6: Finalizing the Plan and Execution


Once you have identified the perfect, functional arrangement on paper, you can finalize your strategy.


1. Annotate the Final Map


Secure the chosen template arrangement to your map. Label every piece of furniture and, most importantly, annotate the requiredclearances andpathway widths. The finalized, dimensioned plan is your definitive shopping list and installation guide.


2. The Real-World Footprint Test


Before placing a final order, take your plan outside for a final verification.

  • Use Visual Markers: Use brightly colored chalk, spray paint (temporary), or painter's tape to mark theexact footprints of the planned backyard furniture onto the patio or deck surface.
  • Walk and Interact: Walk around the taped outlines. Sit down (imagining the furniture). Push an imaginary chair back. Check the view and the traffic flow. This exercise often highlights minor adjustments (like moving a chair 6 inches) that make a significant difference in comfort.


Conclusion:


Successfully measuring and mapping your backyard is the most critical step in creating a beautiful and functional outdoor space. By systematically translating your garden or patio into a scaled blueprint, you shift the process from hopeful guessing to confident design.

Your finished map, complete with functional zones and scaled furniture templates, is your blueprint for success. It ensures that every item of backyard furniture you purchase fits precisely and flows effortlessly, maximizing every square foot of your valuable outdoor area.

Explore different outdoor furniture options here!


Also in News

Elevate Your Bathroom: Essential Accessories for a Stylish Look

A Clear Path to Selling Your House Quickly

Building Trust When Shopping Online